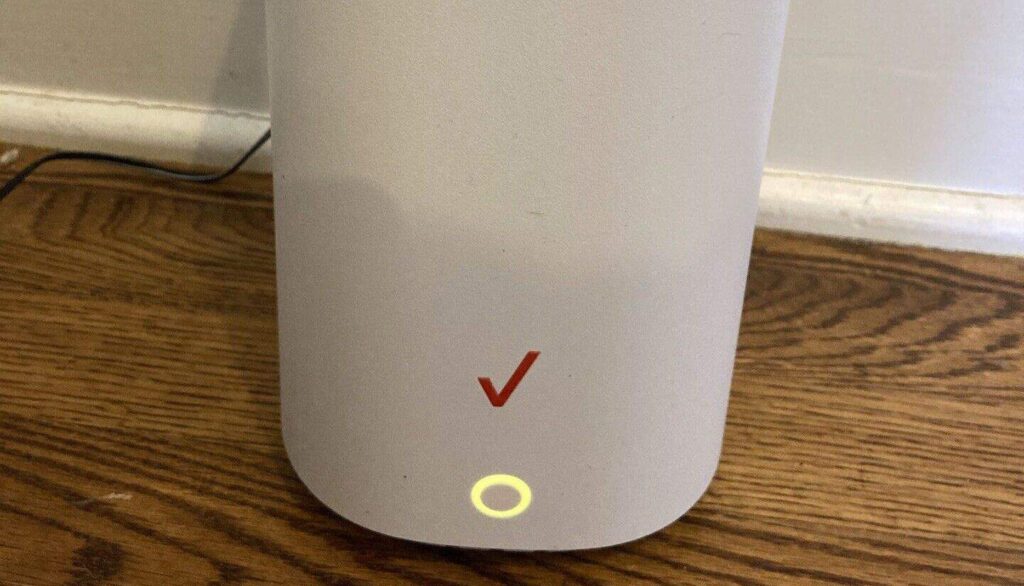
Encountering a yellow light on your Verizon router can be alarming, especially if it affects your internet connectivity. This comprehensive guide will help you understand what the yellow light indicates and provide step-by-step instructions to fix the issue, ensuring you restore your internet connection quickly and efficiently.
What Does the Yellow Light on a Verizon Router Mean?
The yellow light on your Verizon router typically indicates that the router is experiencing connectivity issues. This could be due to a variety of reasons, including firmware updates, network disruptions, or hardware malfunctions. Identifying the root cause is essential to resolving the problem.
Common Causes of the Yellow Light on a Verizon Router
- Firmware Update
- During firmware updates, the router may display a yellow light. This is usually temporary and should resolve once the update is complete.
- Network Issues
- Problems with your internet service provider (ISP) or network configurations can lead to a yellow light.
- Hardware Problems
- Faulty cables, ports, or internal hardware issues within the router can cause connectivity problems.
- Overheating
- Excessive heat can cause the router to malfunction, indicated by a yellow light.
How to Fix the Yellow Light on a Verizon Router
1. Check for Firmware Updates
- Access your router’s admin panel by typing its IP address (usually 192.168.1.1) into your web browser.
- Log in using your username and password (found on the router or in the user manual).
- Navigate to the firmware update section to see if an update is in progress or available.
- If an update is available, follow the prompts to install it and wait for the router to reboot.
2. Restart Your Router
- Unplug the router from the power source.
- Wait for about 30 seconds to 1 minute.
- Plug the router back in and allow it to fully restart.
- Check if the yellow light has turned off, indicating restored connectivity.
3. Check All Connections
- Ensure that all cables (power, Ethernet, and coaxial) are securely connected.
- Look for any visible damage to the cables and replace them if necessary.
- Verify that the cables are connected to the correct ports.
4. Reset Your Router
- Locate the reset button on your router (usually a small pinhole).
- Use a paperclip or similar object to press and hold the reset button for about 10 seconds.
- Release the button and allow the router to reboot.
- Note: Resetting your router will erase any customized settings, so be prepared to reconfigure your network.
5. Check for Overheating
- Ensure your router is placed in a well-ventilated area.
- Avoid placing it near heat sources or in enclosed spaces.
- If the router feels hot to the touch, turn it off and allow it to cool down before restarting.
6. Contact Verizon Support
- If none of the above steps resolve the issue, contact Verizon customer support for further assistance.
- They can perform remote diagnostics and determine if a technician visit or router replacement is necessary.
Preventative Tips to Avoid Future Issues
- Regular Maintenance
- Keep your router’s firmware updated to ensure it runs smoothly and securely.
- Optimal Placement
- Place your router in a central, open location to avoid overheating and ensure even signal distribution.
- Secure Connections
- Regularly check and secure all cable connections to prevent accidental disconnections or damage.
Conclusion
A yellow light on your Verizon router signifies connectivity issues that can often be resolved with simple troubleshooting steps. By following this guide, you can quickly identify and fix the problem, ensuring your internet connection is restored without unnecessary delays. If the issue persists, contacting Verizon support is the best course of action to ensure a professional resolution.